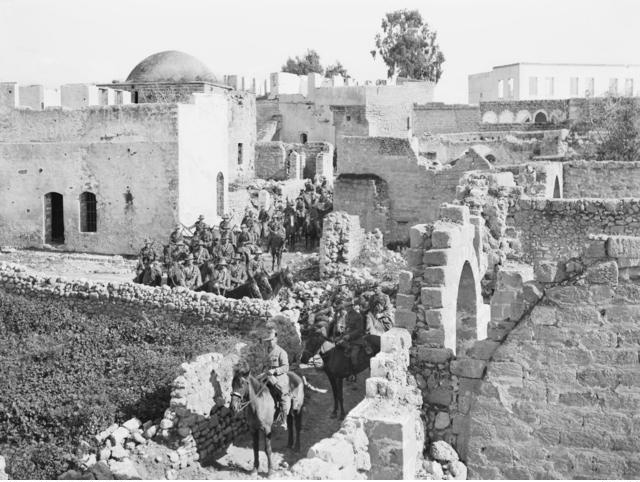
By the autumn of 1917, the Middle Eastern theatre of World War I had settled into a costly stalemate along the Gaza-Beersheba line. Earlier that year, the British Empire’s Egyptian Expeditionary Force (EEF) suffered two disastrous defeats at Gaza in March and April. Ottoman forces, heavily fortified and led by German General Erich von Falkenhayn and Ottoman commanders, held an entrenched 30-mile defensive barrier stretching from the Mediterranean coast at Gaza inland across the desert to Beersheba.
The Third Battle of Gaza, fought between 1 and 7 November 1917, was a decisive engagement of the First World War and a major turning point in the British campaign against the Ottoman Empire in Palestine. After two unsuccessful attempts to capture Gaza earlier that year, British and Commonwealth forces returned with a different strategy. Rather than attempting another costly frontal assault on the heavily defended town, General Edmund Allenby sought to break through the Ottoman defensive positions to the east, capture the vital water supplies and railway connections, and force the Ottoman Seventh and Eighth Armies into retreat.
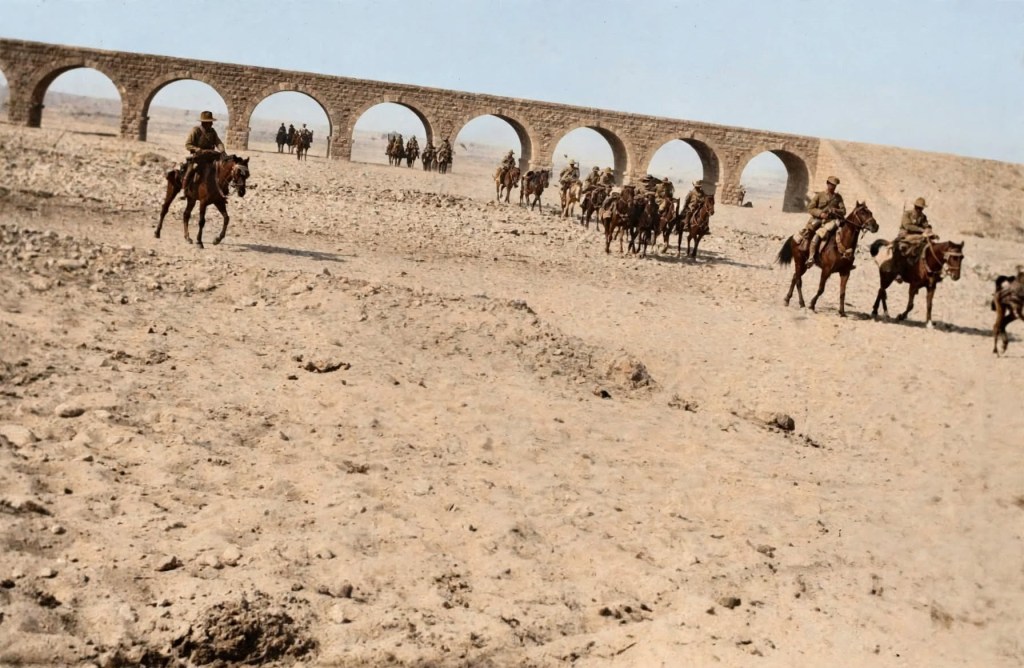
The resulting victory opened the way for the British advance into southern Palestine, the eventual capture of Jerusalem in December 1917, and the collapse of Ottoman military resistance in the region during the following year.
Yet the Third Battle of Gaza was more than a military victory. It was fought across a landscape of ancient settlements, barren hills, desert tracks and desperately contested water sources. British, Australian, New Zealand, Indian and other Allied soldiers faced Ottoman troops who had spent months constructing defensive positions across southern Palestine. For the men fighting there, the battle was a brutal combination of artillery bombardment, machine-gun fire, bayonet charges, thirst and exhaustion.
To understand why the battle mattered, it is necessary to look at the two earlier failures that had brought the British army back to Gaza.
The failures of March and April 1917
By the beginning of 1917, British forces had advanced from Egypt into the Sinai Peninsula and were preparing to push into Ottoman-controlled Palestine. The British objective was to remove the Ottoman threat to Egypt and the Suez Canal, one of the most strategically important waterways in the British Empire.
The Ottoman Empire had entered the war on the side of Germany and Austria-Hungary in October 1914. Its forces had already attempted to attack the Suez Canal, but the British had repelled the assaults. The British subsequently began moving eastwards, gradually pushing Ottoman forces out of Sinai.
The next major obstacle was Gaza.
Gaza was an important strategic position because it controlled the coastal approaches into southern Palestine. Together with the nearby town of Beersheba, it formed part of a defensive system protecting the Ottoman positions further north. The terrain around Gaza offered excellent defensive opportunities, with trenches, fortified positions, machine-gun emplacements and artillery covering the approaches.
The First Battle of Gaza took place on 26 March 1917. British forces under General Sir Archibald Murray attempted to capture the town, using infantry and mounted troops. Although British cavalry and infantry managed to penetrate the Ottoman defensive positions, confusion, communication difficulties and concerns about the arrival of Ottoman reinforcements led to the withdrawal of the attacking forces.
The British had come close to taking Gaza but failed to hold their gains.
A second attempt followed on 17 April 1917. This time, the British employed a substantial artillery bombardment and used tanks and poison gas in an effort to break through the Ottoman defences. However, the Ottoman positions had been strengthened, and the British attack was repulsed with heavy casualties.
The two defeats were costly. British and Commonwealth forces suffered thousands of casualties without capturing their objective.
The British government and military leadership became increasingly dissatisfied with Murray’s conduct of the campaign. In June 1917, General Edmund Allenby was appointed commander of the Egyptian Expeditionary Force. He arrived in Egypt in late June and immediately began reorganising the army and preparing a new offensive.
Allenby understood that another direct assault on Gaza would probably produce another disaster. He therefore decided to attack the Ottoman defensive system at its eastern end, where the town of Beersheba offered an opportunity to outflank the main Gaza defences.
Allenby’s new strategy
Allenby’s appointment marked a change in the conduct of the campaign. He brought with him considerable experience from the Western Front, having commanded British forces at the Battle of Arras and elsewhere. He was determined to avoid repeating the mistakes of the previous offensives.
His plan involved deception, careful preparation and a major flanking manoeuvre.
The Ottoman defensive line stretched approximately 30 miles from Gaza on the Mediterranean coast to Beersheba inland. Gaza was heavily fortified, but the eastern end of the defensive system around Beersheba offered an opportunity. If the British could capture the town, they would threaten the Ottoman positions from the rear and potentially force the defenders to abandon Gaza.
The plan required considerable secrecy. British troops and supplies had to be moved across difficult terrain, roads and tracks had to be prepared, and sufficient water had to be transported for thousands of soldiers and their horses.
Water was particularly important. In the arid landscape of southern Palestine, an army could not operate without a reliable supply. Beersheba possessed valuable wells, and capturing them was essential not only to the success of the offensive but also to the survival of the mounted troops.
Allenby also arranged for Gaza to be subjected to a prolonged bombardment. The intention was to convince the Ottoman commanders that the British were preparing another major frontal assault against the town. While the Ottoman defenders concentrated their attention on Gaza, the principal British striking force would move against Beersheba.
The deception was an important part of the operation. The British wanted the Ottoman commanders to anticipate an attack where it was not actually intended to succeed.
The capture of Beersheba on 31 October 1917 became the dramatic opening to the final offensive against the Ottoman defensive line.
The British attack began at dawn. Infantry from the British XX Corps advanced against the Ottoman positions while mounted troops moved to cut off possible reinforcements and escape routes. The Ottoman defenders resisted stubbornly, and the British advance was slower than anticipated.
As the afternoon progressed, the British commanders became increasingly concerned. Darkness was approaching, and the army desperately needed to secure the wells before the Ottoman defenders could destroy them or withdraw with the town’s water supplies.
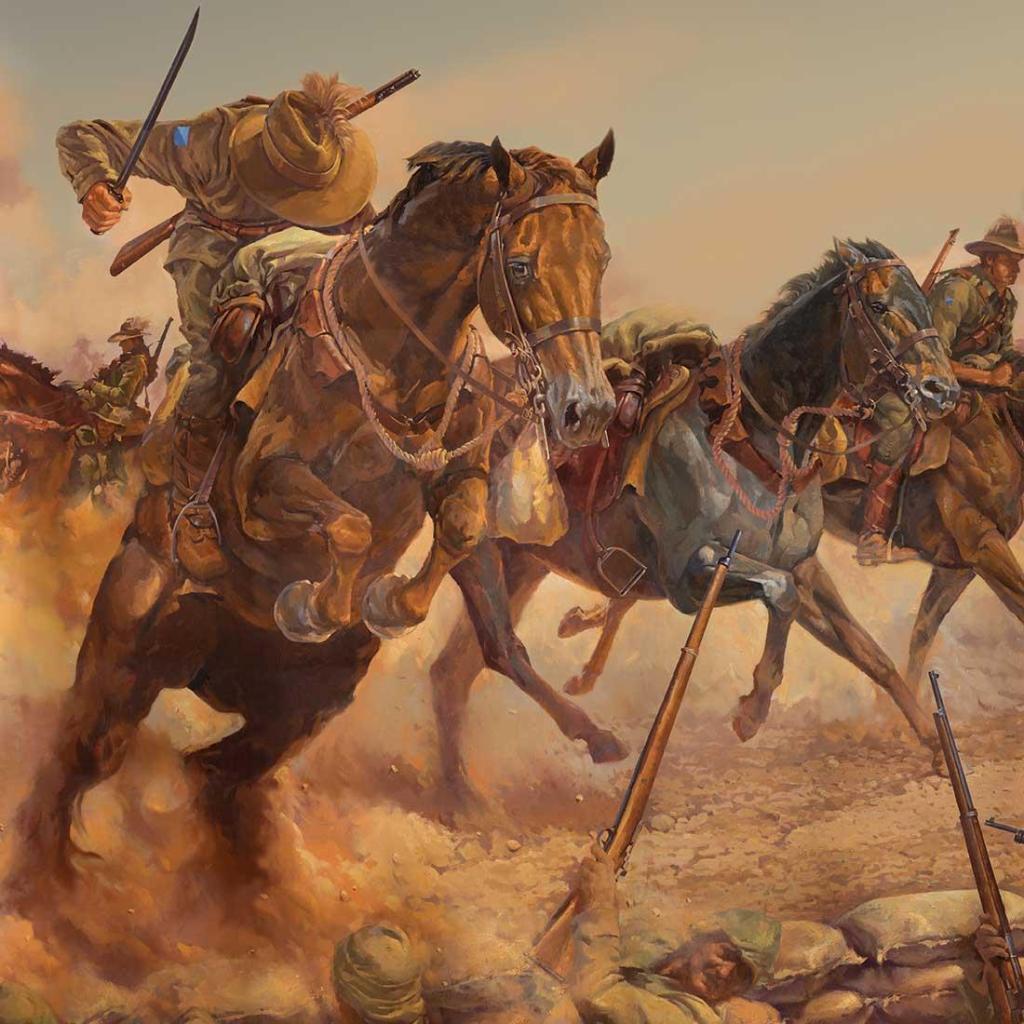
General Sir Harry Chauvel, commander of the Desert Mounted Corps, ordered the 4th Australian Light Horse Brigade to attack.
The brigade was commanded by Brigadier General William Grant. Its 4th and 12th Light Horse Regiments were ordered to charge the Ottoman positions.
It was an extraordinary moment in a war that had become synonymous with machine guns, artillery, barbed wire and the slaughter of infantry attacking entrenched positions.
The Australian Light Horsemen were not equipped with swords or lances. Instead, they carried rifles and bayonets. As they approached the Ottoman trenches, some used their bayonets as makeshift swords.
The horses moved at speed across the open ground. Ottoman defenders opened fire, but the momentum and surprise of the charge carried the Australians towards and through the defensive positions. Some of the Ottoman trenches were not protected by barbed wire, allowing the mounted troops to penetrate the line.
Within a remarkably short time, the Australians had broken through and entered Beersheba. The town and its vital water supplies were secured, and more than 700 Ottoman soldiers were captured in the Australian assault, alongside numerous prisoners taken elsewhere during the day’s fighting.
The Australian casualties were relatively light compared with the scale of the achievement, although the brigade suffered 67 casualties, including 31 killed.
The charge at Beersheba subsequently became one of the most celebrated episodes in Australian military history. It was also an important tactical success because it opened the eastern flank of the Ottoman defensive system.
However, the capture of Beersheba did not immediately bring the campaign to an end. The Ottoman forces still possessed substantial defensive positions, and further fighting would be necessary before the entire line could be broken.
While the main British offensive was developing around Beersheba, Gaza remained under sustained bombardment.
Beginning on 27 October, British artillery and naval guns subjected the Ottoman positions to an intense bombardment. The bombardment continued for several days, destroying defensive installations and disrupting communications. British infantry formations were also positioned in such a way as to reinforce the impression that another frontal assault was imminent.
The Ottoman defenders had every reason to take the threat seriously. They had already repelled two British attacks and had spent months strengthening their positions. Gaza was protected by an elaborate network of trenches, redoubts and machine-gun posts.
The Ottoman forces were commanded by General Kress von Kressenstein, a German officer serving with the Ottoman army. He understood the importance of Gaza and the wider defensive line, but the capture of Beersheba had placed his forces in an increasingly dangerous position.
The British attacks against the eastern Ottoman positions were now threatening to turn the entire defensive system. If the British broke through around Hareira and Sheria, the Ottoman troops defending Gaza risked being outflanked and cut off.
On 1 and 2 November, British forces launched attacks against the Gaza defences. These assaults met determined resistance. The Ottoman defenders fought from their trenches and fortified positions, inflicting casualties on the advancing British and Commonwealth troops.
The fighting was particularly intense around the coastal defences and the positions overlooking Gaza. British infantry faced machine-gun fire and artillery while attempting to advance across exposed ground.
Although the attacks did not immediately capture the town, they contributed to the pressure being placed on the Ottoman defenders. The threat from the east was becoming increasingly serious.
The Third Battle of Gaza was now developing into a much larger operation than a straightforward assault on the town itself. The decisive fighting was taking place across the entire Gaza-Beersheba defensive line.
Hareira and Sheria: The breakthrough
The next stage of Allenby’s offensive focused on the Ottoman defensive positions around Hareira and Sheria.
These positions were particularly important because they formed part of the central section of the Ottoman defensive system. Their capture would open the way for the British to advance towards Gaza from the east and threaten the communications of the Ottoman forces.
On 6 November, British infantry attacked the Ottoman positions around Hareira and Sheria. The fighting was fierce, and the Ottoman defenders resisted with considerable determination.
The British XX Corps faced fortified redoubts, machine-gun positions and defensive trenches. The attackers had to advance against prepared positions, and the fighting involved heavy artillery support and infantry assaults.
The capture of the eastern defensive positions gradually undermined the Ottoman line. On 7 November, Hareira and Sheria fell, leaving the Ottoman forces in an increasingly precarious situation.
The consequences were immediate. The Ottoman commanders now faced the possibility that their troops defending Gaza would be surrounded or cut off from the retreating forces to the east.
Kress von Kressenstein recognised that holding Gaza was no longer a realistic option. The Ottoman forces had already suffered considerable losses, and there were insufficient reserves to restore the defensive line.
The evacuation of Gaza began during the night of 5 November and was completed before the British occupied the town on 7 November. Ottoman rearguards remained in the area to delay the British advance and protect the retreating army.
The town that had resisted two British assaults earlier in the year was finally abandoned.
The British XXI Corps entered Gaza on 7 November, encountering considerably less resistance than during the previous battles. After months of fighting, the Ottoman stronghold had fallen.The fall of Gaza marked the collapse of the Ottoman defensive line in southern Palestine, but Allenby was not prepared to allow the enemy to withdraw without pursuit.
British and Commonwealth mounted formations advanced northwards, attempting to catch the retreating Ottoman forces before they could establish another defensive position.
The Ottoman Seventh and Eighth Armies were withdrawing, but they had not been destroyed. Their commanders managed to preserve substantial elements of their forces, which would continue fighting during the subsequent campaign.
The pursuit was complicated by difficult terrain, exhausted horses, limited water supplies and the logistical problems associated with moving a large army across Palestine. Nevertheless, British and Commonwealth forces continued their advance.
On 14 November, New Zealand Mounted Riflemen fought Ottoman troops at Ayun Kara, south of Jaffa. The engagement demonstrated that the Ottoman army remained capable of offering determined resistance despite the defeat around Gaza and Beersheba.
The British advance continued towards Jerusalem, which had become one of Allenby’s principal objectives.
On 9 December 1917, Jerusalem surrendered to British forces. Two days later, Allenby entered the city on foot through the Jaffa Gate, deliberately avoiding the appearance of a conquering monarch. His entry was intended to demonstrate respect for the religious and historical significance of the city.
The capture of Jerusalem was an enormous political and propaganda victory for Britain. It also marked another major stage in the destruction of Ottoman authority in Palestine.
However, the war was far from over. Ottoman forces continued resisting the British advance throughout 1918, and it was not until the decisive Battle of Megiddo in September 1918 that Allenby’s army effectively destroyed the Ottoman military position in Palestine.
The human cost of the battle
The Third Battle of Gaza was a victory for the British Empire, but it came at a considerable human cost.
British, Australian, New Zealand, Indian and other Commonwealth troops had fought across an unforgiving landscape against an enemy who was defending prepared positions. The fighting involved infantry assaults, artillery bombardments, cavalry operations and bitter engagements around fortified redoubts.
For the soldiers, the conditions were often as difficult as the fighting itself. Water was scarce, the heat and dust were exhausting, and the distances involved in moving men, horses, ammunition and supplies placed enormous demands on the army.
The Ottoman soldiers also endured terrible conditions. Many were poorly supplied, and the retreat placed additional strain on an army already suffering from shortages and the wider economic difficulties affecting the Ottoman Empire.
The civilian population of Palestine had also experienced years of war, shortages and disruption. The campaign was fought in a region whose inhabitants had little control over the military and political decisions determining their future.
The capture of Gaza therefore represented not simply the defeat of an Ottoman garrison, but the beginning of a fundamental political transformation in the region.
The Third Battle of Gaza was one of the most important Allied victories in the Middle Eastern theatre of the First World War.
It ended the Ottoman defensive position that had blocked the British advance into Palestine for much of 1917. More importantly, it demonstrated the effectiveness of Allenby’s combination of deception, manoeuvre and concentrated military force.
The failure of the first two battles had shown the dangers of repeatedly attacking heavily fortified positions from the front. Allenby’s decision to strike at Beersheba and turn the Ottoman flank fundamentally changed the character of the campaign.
The Australian Light Horse charge at Beersheba became an enduring symbol of the battle, but it should not overshadow the contributions of the British infantry, New Zealand mounted troops, Indian formations, artillery units and the many other soldiers who helped break the Ottoman defensive line.
The victory also had consequences far beyond the battlefield.
The British conquest of Palestine contributed to the eventual dismantling of Ottoman rule in the Middle East. Following the war, Britain established control over Palestine under a League of Nations Mandate. The political arrangements that followed would have profound and lasting consequences for the region.
The Balfour Declaration, issued on 2 November 1917, during the fighting around Gaza, had already expressed the British government’s support for the establishment of a national home for the Jewish people in Palestine. Its relationship with Britain’s wartime promises to Arab leaders and the subsequent mandate system would become central to the political disputes that shaped the modern Middle East.
The Third Battle of Gaza was therefore part of a much larger historical turning point, one in which military victory, imperial ambitions and competing national aspirations became intertwined.
For the soldiers who fought there, however, the significance was much more immediate. They had endured months of frustration, two costly defeats and the exhausting conditions of the Sinai and Palestine campaign. In November 1917, they finally broke through the Ottoman defences.
Gaza, which had resisted the British army twice earlier that year, had fallen.
The road to Jerusalem was open.
And although the First World War would continue for another year, the Ottoman Empire’s position in Palestine had suffered a blow from which it would never recover.
Further reading and historical sources
New Zealand History – The Third Battle of Gaza: A detailed account of the campaign, including the fighting at Hareira and Sheria and the Ottoman withdrawal.
Sources
https://en.wikipedia.org/wiki/Third_Battle_of_Gaza
https://livesofthefirstworldwar.iwm.org.uk/story/44249
https://www.dublin-fusiliers.com/palestine/3-battle-gaza.html


Leave a Reply